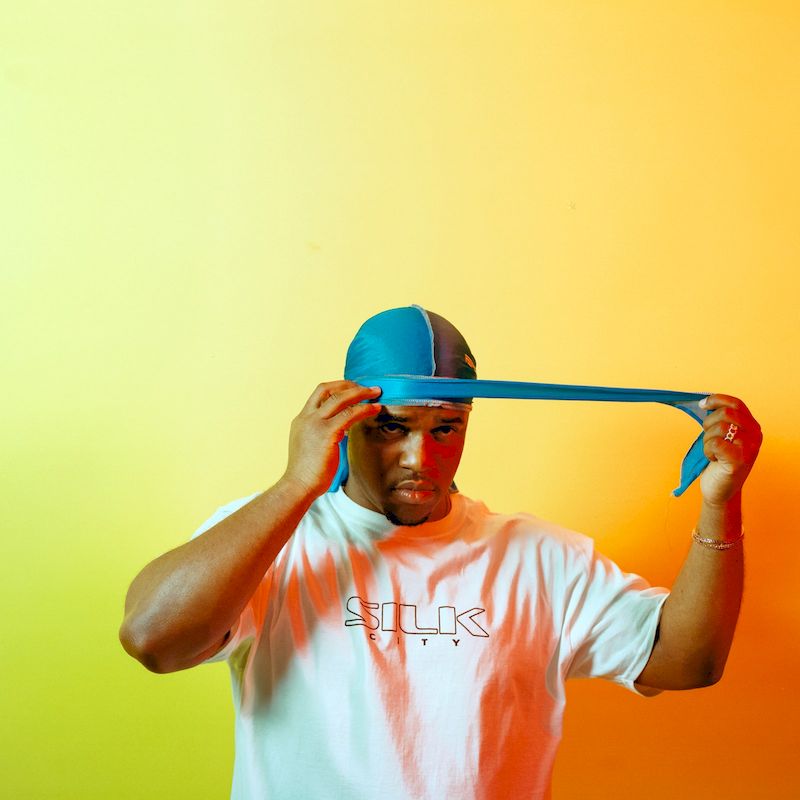
In recent years, durags have surged in popularity, becoming more than just a functional garment. They have carved a niche in streetwear, making a bold fashion statement. While you can buy a durag from numerous stores, making one can be a fun DIY project that not only saves money but also allows for personal creativity. In this comprehensive guide, we will explore how to make a durag out of a shirt, discussing the necessary materials, steps to take, and tips and tricks to perfect your creation.

Contents
Understanding the Durag: Origins and Purpose
Before diving into the process of making a durag out of a shirt, it’s essential to understand what a durag is and its historical significance. Originally worn to protect hairstyles, particularly waves, the durag has roots in African American culture and has served various purposes, from aiding in hair preservation to being a fashion accessory.
The Cultural Significance
Durags are more than just a tool for hair care; they hold a symbolic status within the African American community. Initially popularized in the 1970s and 1980s alongside hip-hop culture, durags have transitioned into a symbol of pride and personal expression.
Modern Durag Trends
In contemporary times, durags have shifted from being solely functional to a style staple. Designers like Kanye West and brands like Off-White have incorporated them into runway designs, showcasing durags as a trendy accessory. Understanding this context can enhance your appreciation of crafting your own durag.
Choosing the Right Shirt
Now that you’ve piqued your interest in how to make a durag out of a shirt, the first step is selecting the right shirt. The fabric type, size, and color play crucial roles in the final product.
Fabric Types
The most suitable materials for making a durag include:
- Cotton: Breathable and lightweight, making it comfortable for extended wear.
- Satin: Known for its smooth texture, satin helps preserve hairstyles and adds a touch of luxury.
- Polyester blends: These fabrics can offer stretch and durability, making them an excellent choice for a long-lasting durag.
Size Matters
Ideally, choose a larger shirt, preferably an oversized tee or a long-sleeve shirt. The extra fabric ensures that you can create a longer and wider durag, which helps cover more hair.
Color and Pattern
The color and pattern of your shirt can reflect your personality. Whether you prefer a bold graphic tee or a simple solid, the right choice will enhance the visual appeal of your durag.

Materials Needed
Before starting your project on how to make a durag out of a shirt, gather the necessary materials:
Tools
- Fabric scissors: To cut the shirt accurately.
- Sewing machine or needle and thread: For sewing the edges (optional for a more polished finish).
- Measuring tape or ruler: To ensure the correct dimensions.
- Chalk or fabric marker: For marking the cutting lines.
Additional Materials
- Iron: To smooth out the fabric before cutting.
- Pins: To hold fabric in place while sewing.
- String or elastic: For securing the durag comfortably on your head (optional).
Step-by-Step Guide: How to Make a Durag Out of a Shirt
With your materials gathered and your shirt selected, let’s dive into the detailed step-by-step process of transforming a shirt into a stylish durag.
Preparing Your Shirt
- Wash and Dry: Ensure your shirt is clean and pre-shrunk to avoid complications later.
- Iron the Shirt: A smooth surface will assist in making clean cuts.
- Lay the Shirt Flat: Spread the shirt on a clean, flat surface.
Cutting the Fabric
- Measure Your Fabric: For a standard durag, aim for dimensions of approximately 36 inches in length and 12 inches in width. Adjust based on your preference for coverage.
- Mark the Cut Lines: Use chalk or fabric marker to outline the shape. Typically, you would cut a rectangle that is double the desired width to allow for folding.
- Cut the Fabric: Carefully cut along the marked lines, being mindful of keeping the edges straight.
Sewing Edges (Optional)
- Fold Edges: Fold the edges of the durag to prevent fraying. This is optional but highly recommended for durability.
- Pin in Place: Use pins to hold the folds in place.
- Sew or Hem the Edges: If you have a sewing machine, this is the perfect opportunity to finish the edges. Alternatively, sew them by hand.
Creating the Ties
- Measure Out Ties: Cut two strips approximately 1.5 inches wide and 16 inches long. These will serve as the ties for your durag.
- Sew Ties: Fold the strips inward, pin them down, and sew along the edge to create neat, finished ties.
- Attach Ties to Durag: Securely sew the ends of each tie to either side of the durag about an inch from the top. Ensure they’re symmetrical and well-attached for longevity.
Final Touches
- Iron Again: Give the completed durag a final press with an iron to ensure everything lays flat.
- Test Fit: Before wearing it out, do a test fit to see if it’s comfortable and adjust if necessary.
Styling Your Durag
Now that you’ve crafted your durag, consider how to wear it stylishly. You can use it as a practical accessory for maintaining your hairstyle or flaunt it as part of your outfit.

Tips and Tricks for a Successful Durag
Creating your durag can be an enjoyable experience, and here are some helpful tips to ensure your project goes smoothly.
Choose the Right Time
Pick a time when you can focus on the project without interruptions. This will help you achieve better results and make the crafting process more enjoyable.
Experiment with Patterns
Don’t hesitate to try different shirts or patterns. Bold designs can make your durag a standout piece in your wardrobe.
Add A Personal Touch
Consider customizing your durag with fabric paint, patches, or embroidery to make it uniquely yours.
Be Patient
Crafting takes practice, so don’t rush through the steps. Take your time to ensure each stage is completed thoughtfully.
Seek Inspiration
Explore social media platforms like Instagram or Pinterest for creative ideas or tutorials on different durag styles and how they can fit within various outfits.
Caring for Your Homemade Durag
Once you’ve completed your durag, caring for it properly will ensure it lasts for years.
Washing Instructions
- Hand Wash: To preserve the fabric and colors, a gentle hand wash is highly recommended.
- Avoid Fabric Softeners: They can affect the fabric’s ability to hold hairstyles.
- Air Dry: Hang or lay flat to dry, avoiding direct sunlight to prevent fading.
Storing Your Durag
Store your durag flat or rolled up in a cool, dry place to keep it wrinkle-free and to maintain its shape.
Common Mistakes to Avoid
Even experienced DIYers can run into trouble while crafting a durag. Here are some common mistakes and how to avoid them:
Choosing the Wrong Fabric
One of the primary mistakes people make is selecting the wrong type of fabric. While cotton is comfortable, it may not always provide the sleek finish you want for certain styles. Satin blends can yield a more polished look.
Tip: Test a few different materials with your cutting and sewing techniques to see which one you prefer before committing to a single type.
Imperfect Measurements
Taking inaccurate measurements can lead to ill-fitting durags that may not stay in place during use.
Tip: Always double-check your measurements, and if you’re unsure, leave extra fabric that can be trimmed later.
Ignoring the Sewn Edges
Skipping the step to sew down the edges or not doing it properly can lead to fraying, which can make your durag look less polished and affect its longevity.
Tip: If you choose not to sew, consider using fabric glue designed for clothing to secure the edges.
Overlooking Personal Comfort
It’s easy to get caught up in aesthetics and forget about comfort—a durag should fit snugly but not too tightly.
Tip: After you’ve made it, test it out for a few minutes to see if it constricts your head or causes discomfort. Adjust the ties accordingly.
The Versatility of Durags
A durag isn’t just a single-purpose item; it can expand your wardrobe in various ways.
Different Styles of Tying
How you tie your durag can impact both function and style. There are several methods you can explore:
- Classic Tie: Simple and functional, this method is ideal for everyday wear.
- Double Wrap: Best for those with longer hair; it provides extra hold and security.
- Fashion Tie: Crafter a more decorative knot that can be displyed at the front or side for added aesthetics.
Utilizing Your Durag in Different Contexts
Your durag can be used for multiple purposes:
- Sleep Aid: Wearing it to bed helps keep hairstyles intact overnight.
- Workout Companion: A durag can wick away sweat and keep hair off your face during exercise.
- Fashion Statement: Pair it with casual or chic outfits to elevate your look.
Durag Fashion Inspirations
To help inspire your style, consider exploring various ways to wear and incorporate durags into your outfits.
Street Style Influences
Streetwear brands have taken durags and transformed them into must-have accessories. Look at outfits worn by popular influencers:
- Bold Colors: Opt for durags in vibrant hues to stand out.
- Layering: Combine your durag with hoodies, oversized tees, and denim jackets for a laid-back vibe.
- Accessorizing: Pair with earrings, hats, or necklaces to complete your look.
High Fashion Settings
Designer fashion shows have recently embraced the durag, showcasing its versatility. Consider these tips:
- Elegantly Craftsmanship: Wear a well-made durag with an elegant outfit for a chic contrast.
- Event-Specific Styling: For formal events, select a durag that complements your outfit, perhaps matching its color or pattern.


